
Cutout People for Digital Narratives
by Roy Winkelman

One of the most effective ways for students to gain (and demonstrate) understanding is through the creation of a digital narrative. Although digital narratives can be used in any subject area, I especially like to see them used in History classes. Students are great at parroting back dates and facts, and we teachers are sometimes fooled into thinking parroted facts indicate understanding. When students create a digital narrative about a historical event they are forced to enter into the world they are studying. Just be ready to be shocked at some of the misunderstandings that will be uncovered! “Yikes, Johnny got all the textbook facts right, but how could he have possibly thought the Pilgrims had iPhones?!?”
If your students are telling a digital story about people, they are going to need, well, some digital people. The images should be a good scale for their movie, presentation, or whatever technology is being used. They should also have transparent backgrounds so the people can be moved around and interact with each other in front of an appropriate background scene.
Before I get to the process for creating cutout people using Photoshop, I do want to mention a few sources for ready-made images and a couple of optional apps for those not ready to dive into Photoshop.
Ready-Made Cutout People
- The Presentations ETC website has a whole section of cutout people, animals, and word balloons that can be used in digital narratives. I shared this website in the post Paper People for your Preso a year or two ago.
- Here’s a small collection of cutout people from a middle school activity I conducted several years ago. The class used Puppet Pals to create movies as a part of their study of the Castillo de San Marcos in St. Augustine, Florida. The original images were from our ClipArt ETC website.
- Here are a few cutouts I made for a Jack and the Beanstalk activity and a few cutout veggies and rabbits for a Peter Rabbit activity.
- You can also find good collections of cutout people on the Internet. Search for “cutout people,” “PNG people,” or “architectural entourage.” (“PNG” refers to an image file type that allows for transparent backgrounds. “Architectural entourage” is the term used for figures that are added to an illustration of a building to show scale and how people will use the space.) An especially nice collection of people from Latin America can be found at https://escalalatina.com.
Using Keynote or Powerpoint
The two most common classroom presentation tools have a built-in ability to create cutouts. They won’t give you the control that Photoshop does, but they may produce results good enough for many projects.
Using Powerpoint
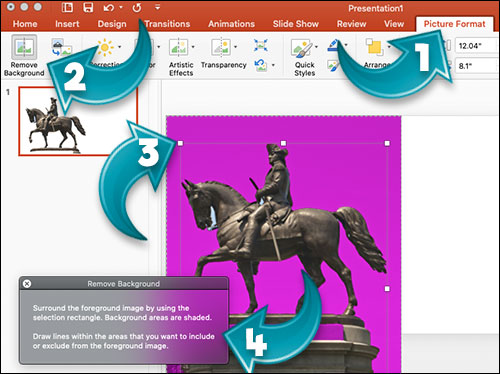
- With your image selected, click on the Format tab.
- Click the Remove Background button and Powerpoint will immediately make its best guess at what you want to remove and color that area so you can see it.
- If Powerpoint didn’t quite get the object you want to keep selected properly, drag the selection handles around to fit the object.
- Tweak the selection by drawing lines in the areas that did not get selected properly. Background areas will switch to foreground and foreground areas will switch to background.
- You can now use the image with the transparent background within Powerpoint or you can export it as a PNG file to preserve the transparency.
Using Keynote

- With your image selected, click on the Image tab.
- Click the Instant Alpha button.
- Drag your cursor around to select the background areas to knockout. The areas will change color as they are selected.
- Click the Done button.
- You can now use the image with the transparent background within Keynote or you can export it as a PNG file to preserve the transparency.
Making Cutout People Using Photoshop
There are dozens of ways of making a selection in Photoshop. When I’ve taught grad classes, we take several weeks to explore them, but since this is a post and not a book, I’m going to just focus on one method that will work well for just about any sort of image that you would like to cut out from the background. I will run through several scenarios depending on the complexity of the image you are cutting out.
Scenario 1: A Simple Cutout
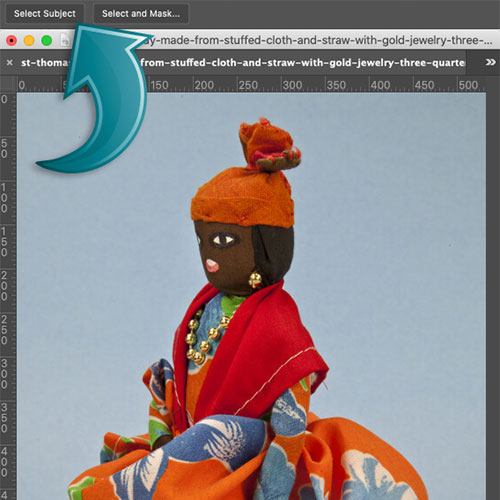
1. If you are starting with a fairly simple image to cut out, such as this one of a doll from St. Thomas, you can let Photoshop do most of the work. Just click the Select Subject button and see if Photoshop can determine what part of the image you want.
(All screenshots are from Photoshop 2021.)
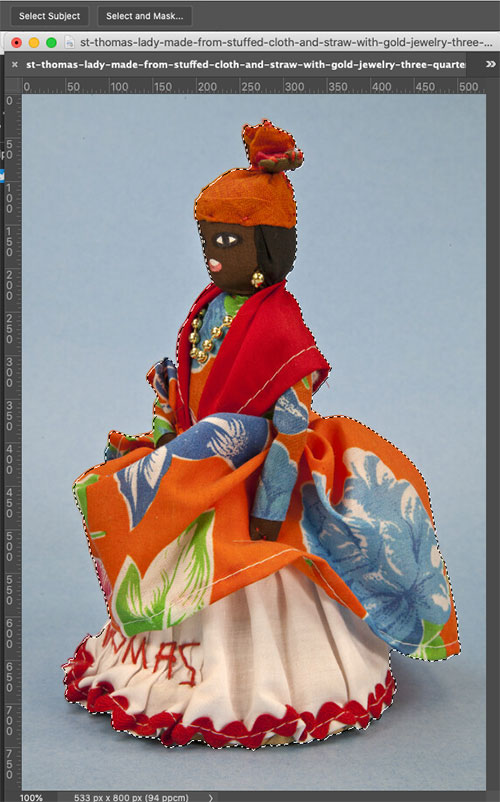
2. If you see a “marching ants” selection around the part of the image you want, congratulations! Photoshop just did most of the work for you.
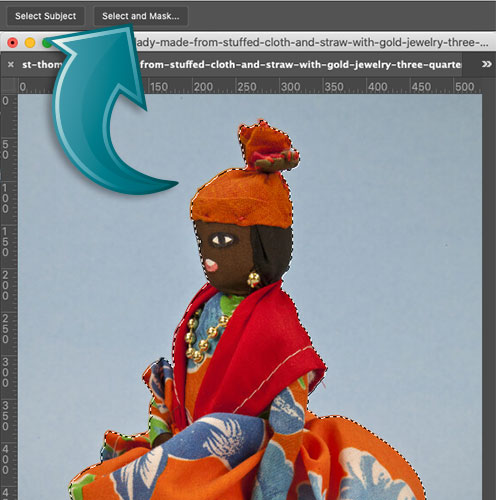
3. Now click the Select and Mask button and the Properties panel will open up.
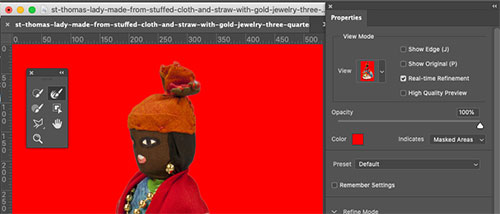
4. There are different “Views” of the way the background to be cut out is indicated. I happen to prefer Overlay, which uses a solid color like red to indicated the area that has been designated as the background. You can experiment with other views that may work better for your or for specific images you’re working with.

5. If all looks good, select Output to New Layer with Layer Mask and you’ll have your chosen image with a transparent background. Be sure to save the file as in PNG to preserve the transparency. You did it! (OK, well Photoshop did most of it, but you did a great job clicking the right buttons.)
Scenario 2: Making the Initial Selection Yourself
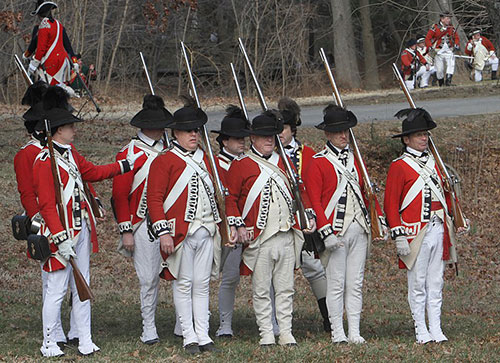
1. Here’s a more complex image from Wikimedia Commons. It’s of Revolutionary War reenactors and is by the contributor “dbking.” I just want to cut out the reenactor on the right, so I’ll have to make that selection myself.
_16.jpg)
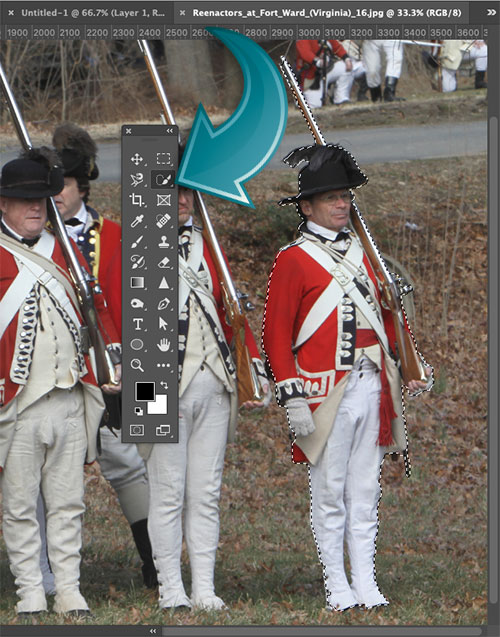
2. I’ve used the Quick Selection Tool to indicate the area of the figure I want to use.
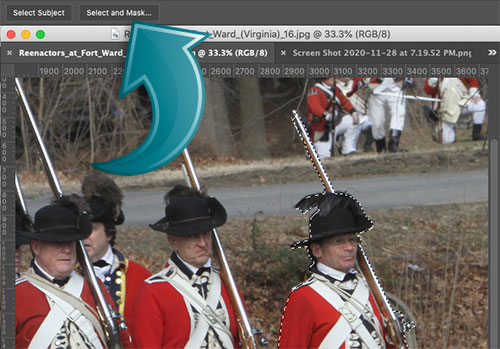
3. Now it’s time to click the Select and Mask button again.
Continue with steps 4 and 5 from the previous scenario and you’ve got one soldier to use in a digital narrative.
Scenario 3: Making and Refining the Selection
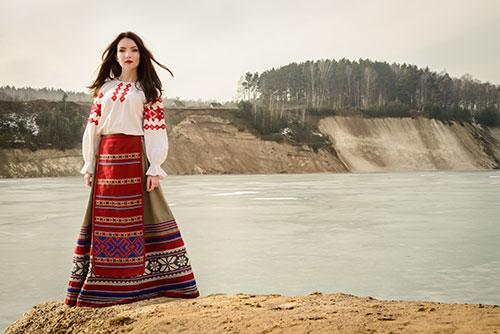
1. Now I’m going to start with a more difficult image. This is a woman dressed in a Belarusian national costume. (Image copyright depositphotos.com/sinada.) Notice that her hair is flying in the breeze. It would be nearly impossible to cut out each individual strand of hair by hand. That’s were the ability to refine a rough original selection comes in handy.
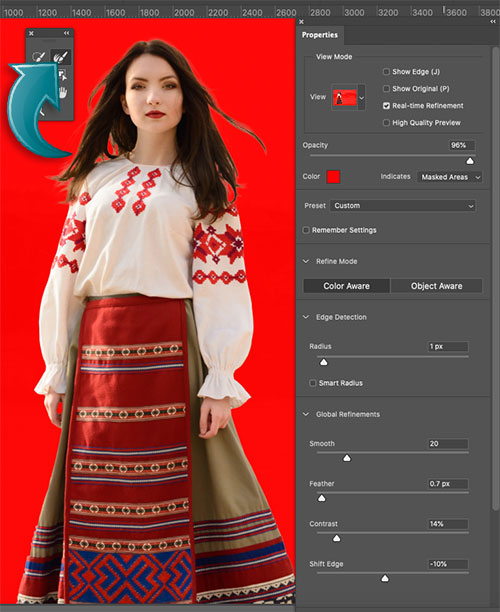
2. As I did last time, I’ll use the Quick Selection Tool to make the initial selection by hand and then click the Select and Mask button.
Then I’ll use the Refine Edge Brush Tool to go over the areas that need to be refined. Make the brush just big enough to cover the edge area you are stroking. Photoshop will just look at the small areas you brush and refine the selections there.
Finally, experiment with the sliders in the Properties panel to see what works best for your image. Usually a little bit of smoothing and feathering helps. You may want to bump the contrast up to as much as 20 for a typical image. If there’s some fringe showing, try moving the Shift Edge slider slightly to the left.
Once it’s looking good, select Output to New Layer with Layer Mask and save as a PNG.
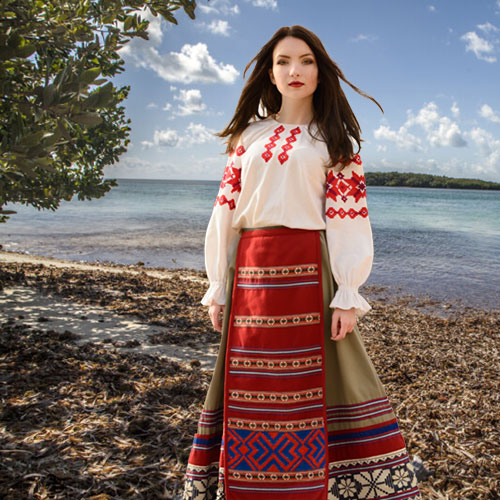
3. The edges of the selection were refined enough that the figure can now be superimposed over any background for use in digital storytelling. Here, I’ve moved her to a beach in Miami.